DIY Wireless Alert Boxes (with plans + parts)

You push a button on a box in one location, and it activates a light and a buzzer in another box. This is done over wifi, so you can place the boxes wherever you need them within that range. Where do you place them? One could be in your house, and the other in your workshop (so family members could contact you when needed), or you can put them in different rooms of the house… there are lots of options.
I’m using it so my kid (who doesn’t have a phone) can easily let me know when I’m working in the shop, and he needs me inside the house. It’s a pretty simple concept, yet very effective, and it can be used in a lot of ways. You could replace the button with different sensors, in which case the signaling box gets activated whenever a laser, temperature, pressure sensor is activated. In fact, you could build a whole little surveillance / alert system this way and make it as large or small as you wish.
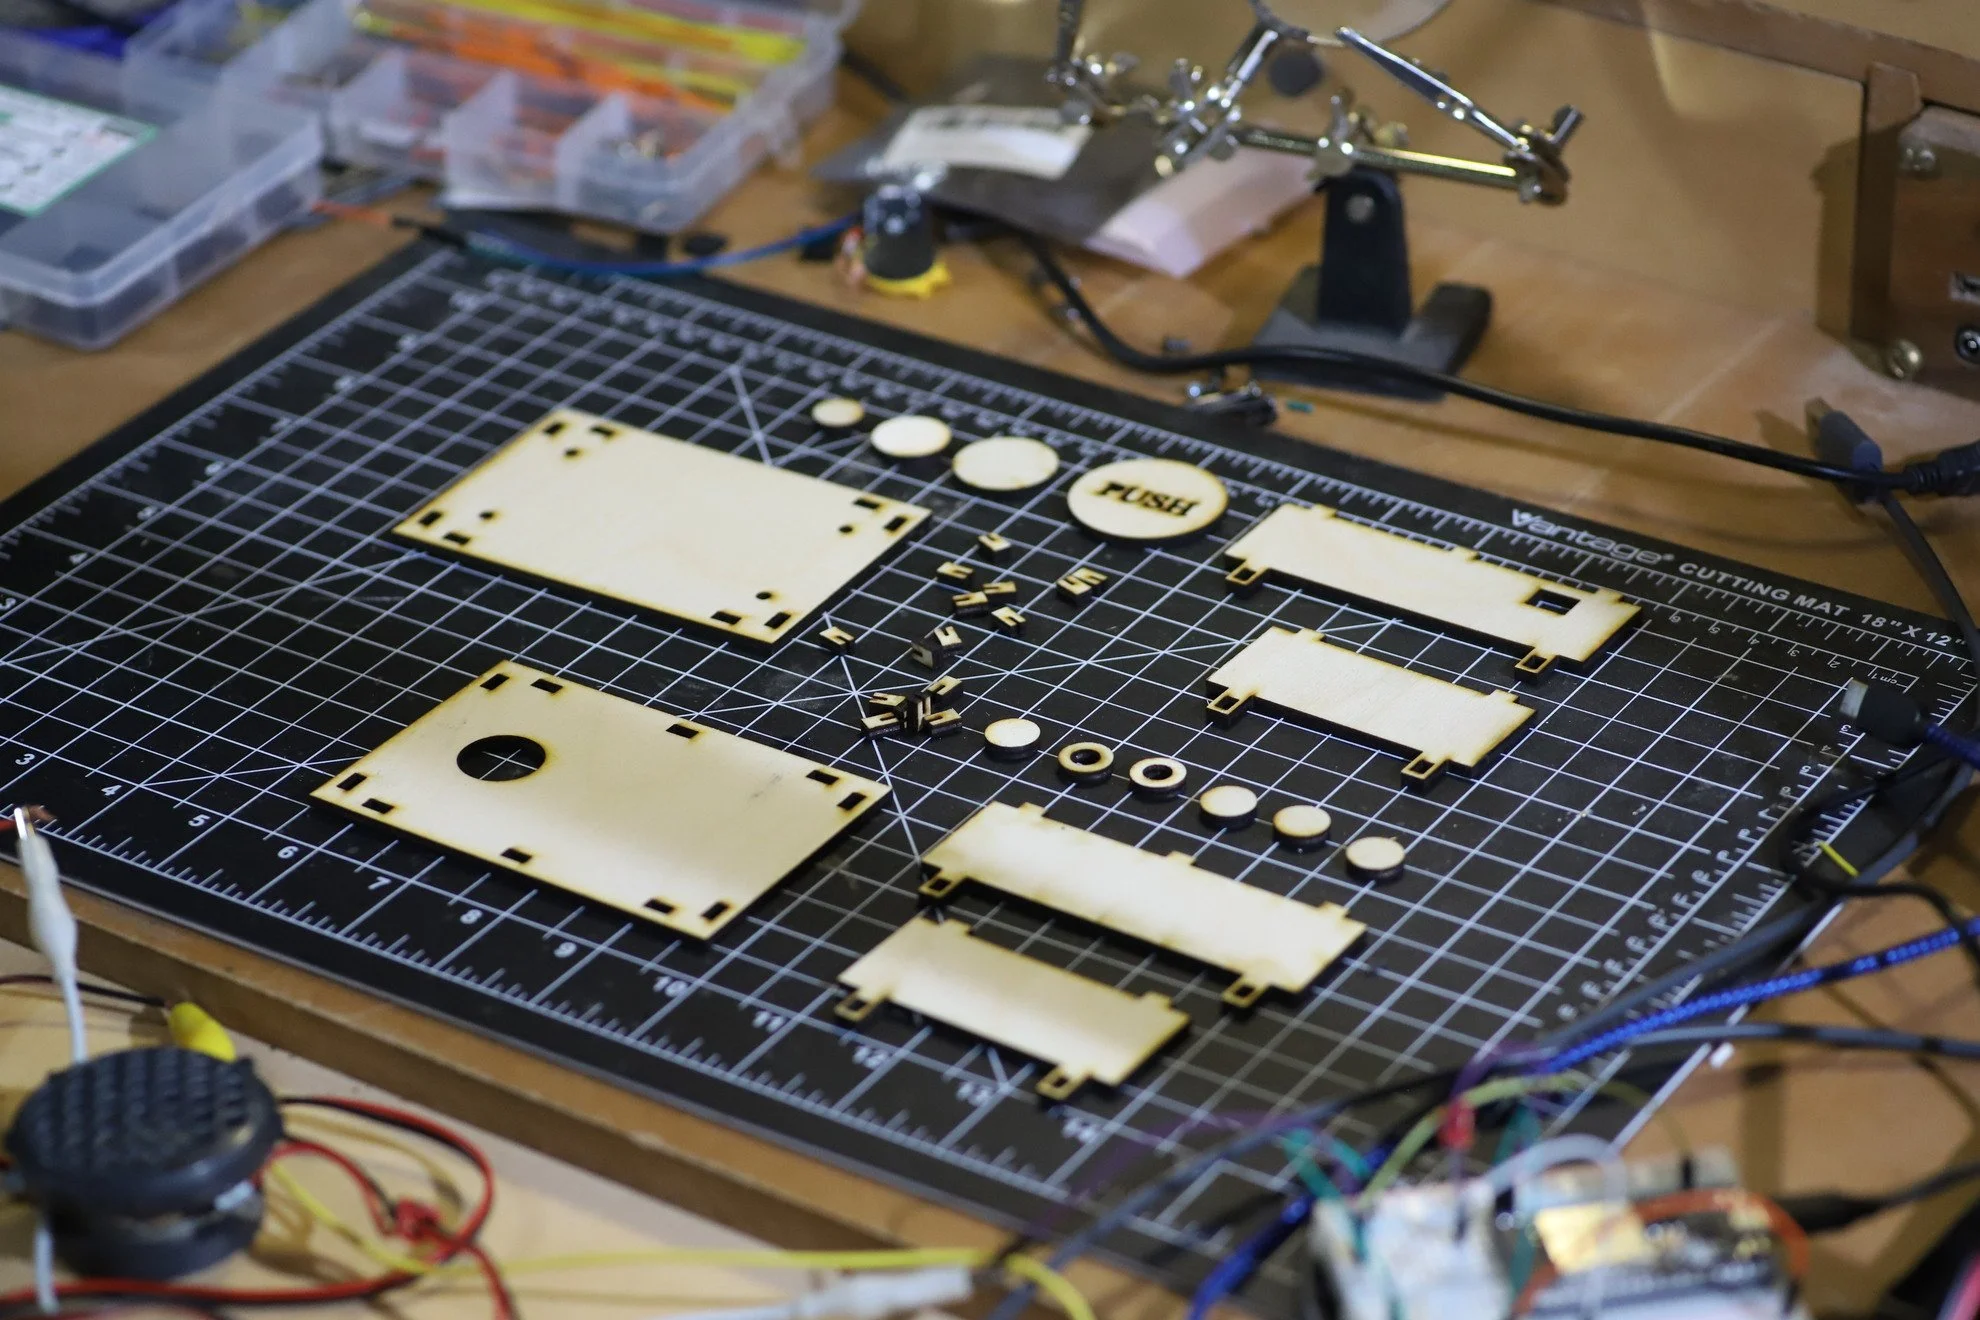
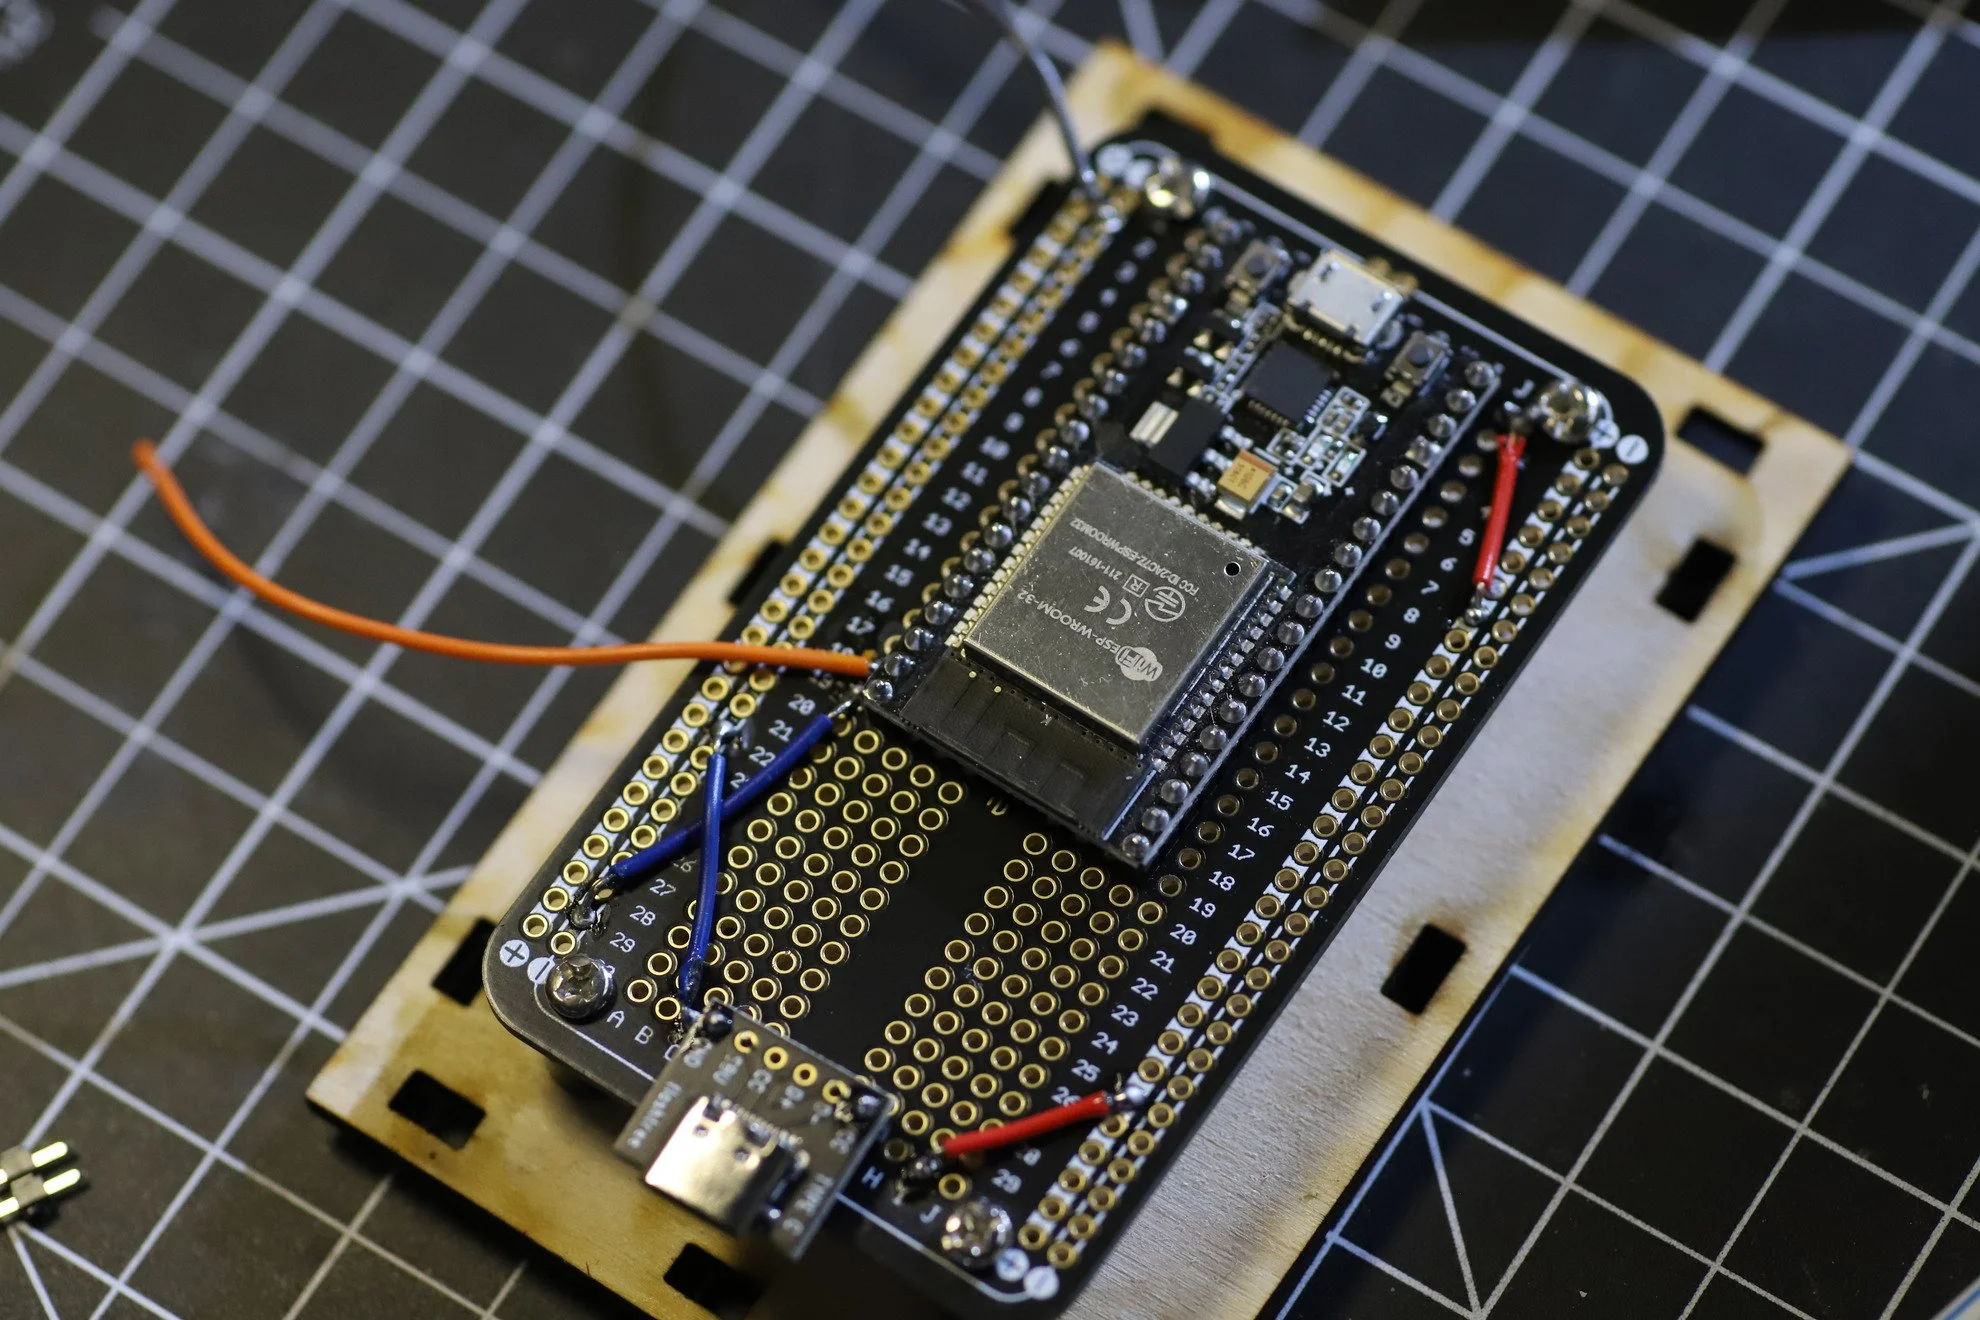
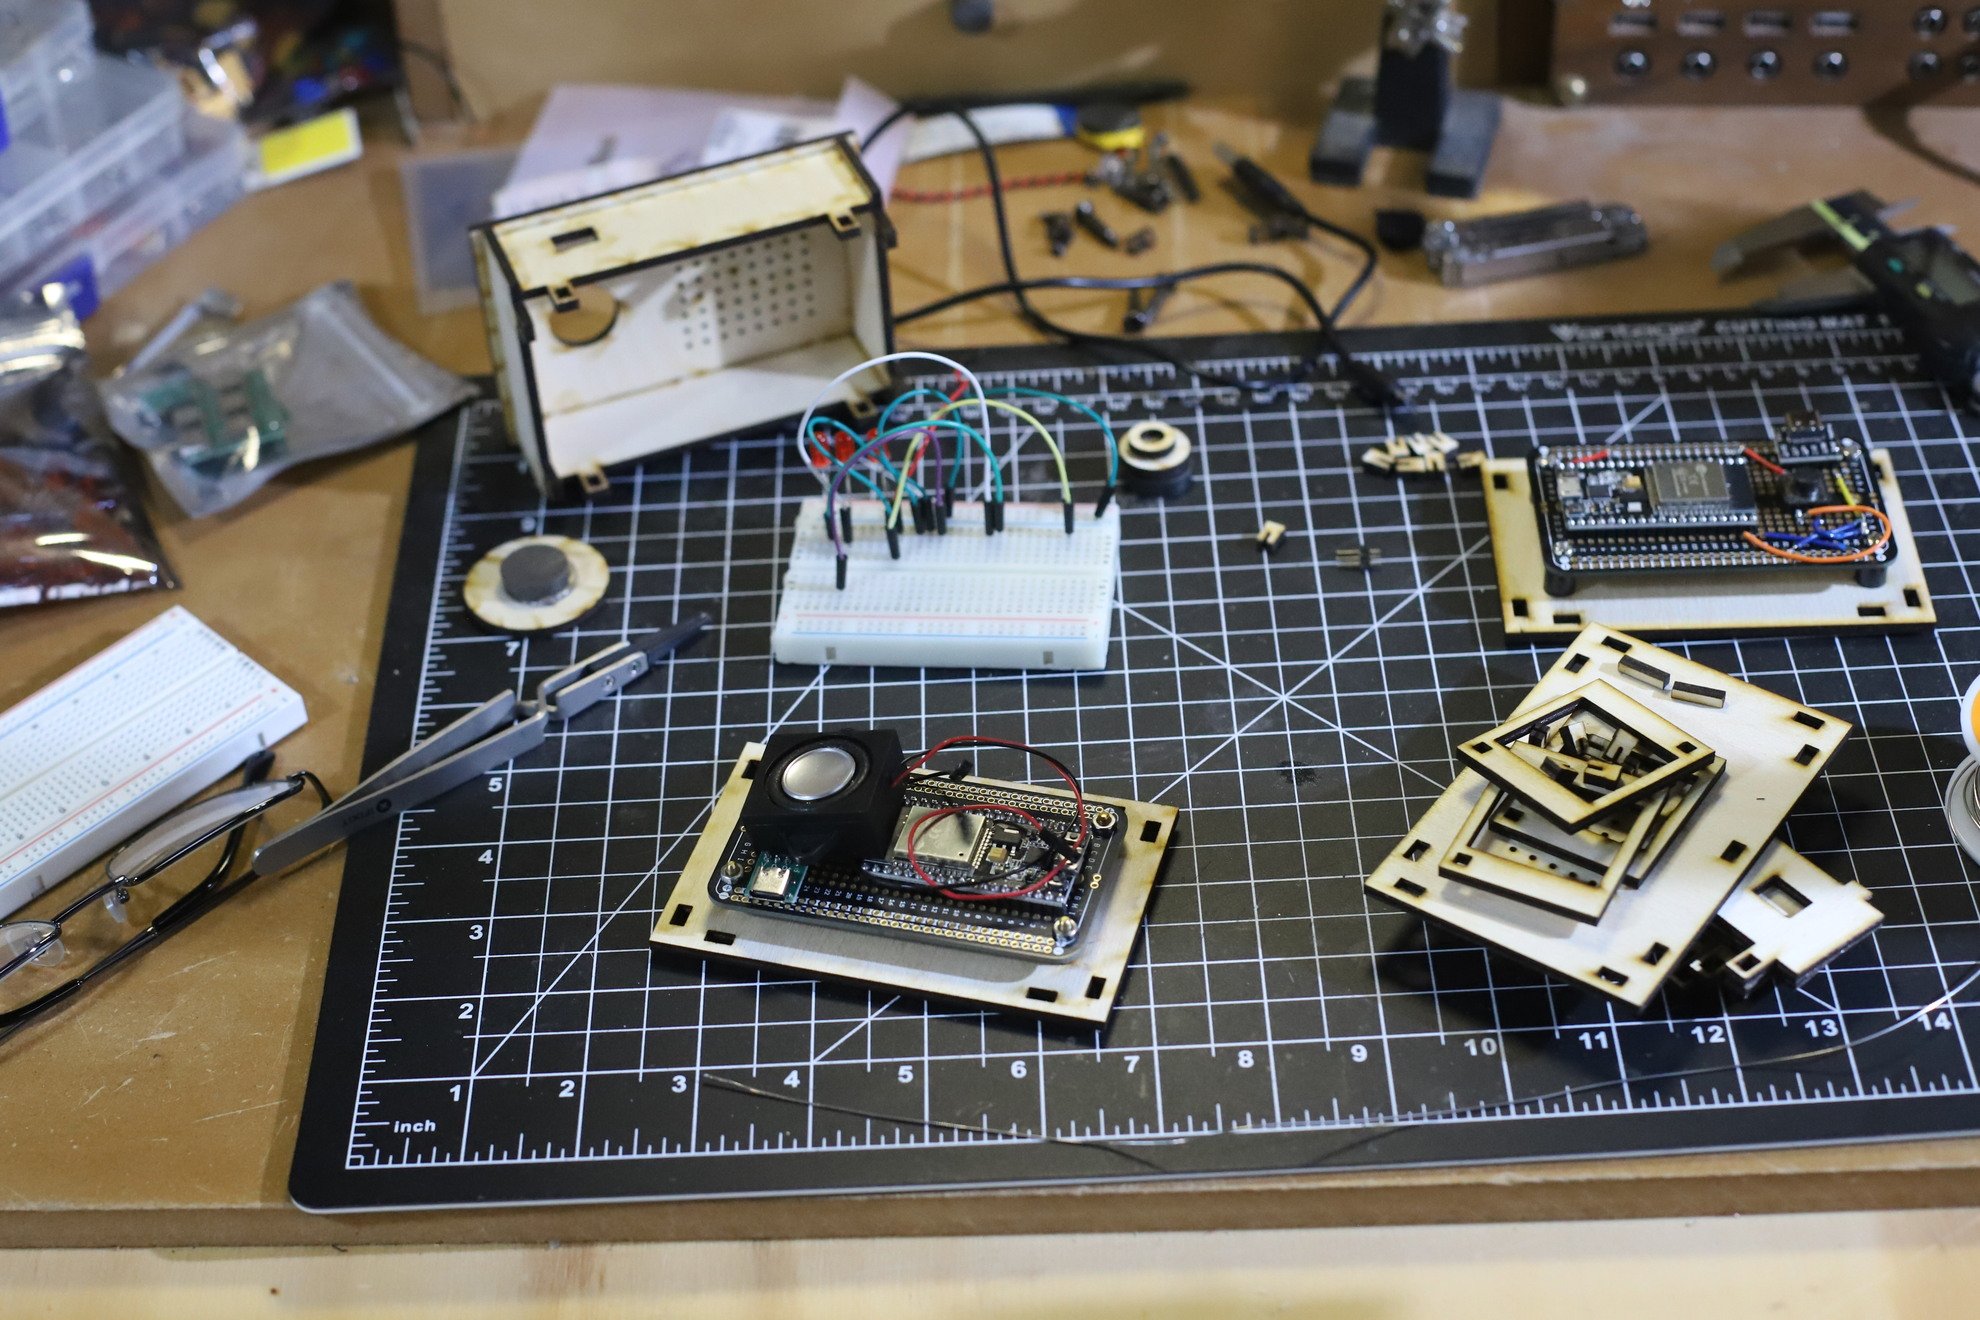
So, what do you need to make this? We’re using two ESP32 micro controllers and some other basic electronics. We’re also building two boxes which we’re cutting out on a laser cutter, and of course we need code to get it all to work.
Here are the parts needed:
ESP32 - https://amzn.to/3Q2VIb7
Jumper Wires - https://amzn.to/3xrKW7F
Wires - https://amzn.to/3vFiGOE
Speaker - https://amzn.to/3xxJIrE
Solderable BreadBoards - https://amzn.to/4cYTWBt
Buttons - https://amzn.to/3Q3mNL7
1/8" Plywood - https://amzn.to/49zxCeX
xtool S1 Laser - https://amzn.to/4cV00ee
The Plan for the boxes
We have a plan for the lasercut boxes. In this digital download you’ll find the vcarve files, as well as PDF, AI, EPS, SVG & DXF formats. The plan costs $5, or it’s free if you’re a patron at the $5 level. Become a patron here.
The Code:
The code is divided up into two files, one for each device. Here you can download the code for free.
CLIENT FILE: Boot Client
SERVER FILE: Boot Server
Video
To get a better perspective on the process, make sure to check out the video!